I want...

 Weight Loss
Leanne’s Canning Adventures: Pickles
September 9, 2011 By
Leanne Vogel
![]()
 March 29, 2017
") Okay so I may have gone a little overboard on the Okanagan fruit and vegetable shopping on my way back from BC last week.
I couldn’t help myself. I had a rented car with loads of extra space and the fruit and veggie stands were calling my name.
For those of you who aren’t familiar, the fruit and vegetables from the Okanagan are the best. The best. Hands down, no arguing there.
So juicy, so ripe, so perfect for canning!
Okay so I may have gone a little overboard on the Okanagan fruit and vegetable shopping on my way back from BC last week.
I couldn’t help myself. I had a rented car with loads of extra space and the fruit and veggie stands were calling my name.
For those of you who aren’t familiar, the fruit and vegetables from the Okanagan are the best. The best. Hands down, no arguing there.
So juicy, so ripe, so perfect for canning!
")

")
Equipment
- Large saucepan
- Medium saucepan
- Measuring cup
- 7 (1L) mason jars with lids
- 21 quart canner
- Canning rack
- Jar lifter
- Funnel
- Lid lifter
- Bubble remover
")
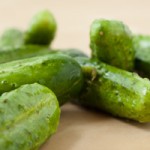
- 7-8 lbs of 3-4 inch pickling cucumbers
- 1 cup sea salt
- 1 tablespoon sea salt
- 7 cups filtered water
- 6½ cups white vinegar
- You’ll make a total of 7 jars. I chose to make each jar a bit different. Instead of listing total ingredients, I’ve listed the quantity of items for 1 jar. If you just want to make 1 kind of pickle from the list below, just multiply the ingredients by 7 to get the total.
- What you’ll need for each jar, no matter what flavor you choose:
- 5 bunches of dill weed separated into 14 portions
- 6 cloves garlic
- 6 peppercorns
- 1 portion dill weed
- ¼ teaspoon red pepper flakes
- ¼ teaspoon mustard seed
- Top with: 4 cloves garlic and 1 portion dill weed
- 4 cloves garlic
- 5 peppercorns
- 1 portion dill weed
- 1 tablespoon dill seed
- Top with: 2 cloves garlic and 1 portion dill weed
- 4 cloves garlic
- 3 peppercorns
- 1 portion dill weed
- 1 bay leaf
- ¼ teaspoon mustard seed
- 1 tablespoon dill seed
- ¼ teaspoon dried thyme leaves
- ¼ teaspoon dried rosemary
- Top with: 1 portion dill weed
- 4 peppercorns
- 1 portion dill weed
- 1 tablespoon dill seed
- ¼ teaspoon mustard seed
- Top with: 1 portion dill weed
- Scrub the cucumbers well under running water to remove dirt. Place in a clean bowl when complete.
- In the canning pot, layer the cucumbers and salt using about one-third of each per layer.
") Add cold water to cover by about 1”. Place a plate on top to weigh down the cucumbers. Cover and let stand for at least 12-24 hours. We just put it in the cool basement.
Add cold water to cover by about 1”. Place a plate on top to weigh down the cucumbers. Cover and let stand for at least 12-24 hours. We just put it in the cool basement.
") Place mason jars in the dishwasher and run using the sanitize setting. A lot of videos I watched just did this and didn’t bother to soak the jars in boiling water the next day, but I did both because I’m a newbie.
Place mason jars in the dishwasher and run using the sanitize setting. A lot of videos I watched just did this and didn’t bother to soak the jars in boiling water the next day, but I did both because I’m a newbie.
Day 2
Trim off 1/8” of the flower end (white end) to prevent soft pickles.") ^ there’s the flower end.
Fill the canning pot with hot water, cover and bring the water to a boil on high heat.
Once boiled, remove lid, place canning rack at the bottom of the pot. Gently place each mason jar in the water, filling the jar up with the water as it hits the bottom of the pot. Use jar lifter (tongs) to set the jars upright.
Once all jars are in the pot, reduce heat to medium low and simmer covered for 30-60 minutes, or until you’re ready to use the jars.
Meanwhile…
In a small saucepan, fill with water and bring to a simmer. Add the lid disks, cover the saucepan, and take it off the heat.
^ there’s the flower end.
Fill the canning pot with hot water, cover and bring the water to a boil on high heat.
Once boiled, remove lid, place canning rack at the bottom of the pot. Gently place each mason jar in the water, filling the jar up with the water as it hits the bottom of the pot. Use jar lifter (tongs) to set the jars upright.
Once all jars are in the pot, reduce heat to medium low and simmer covered for 30-60 minutes, or until you’re ready to use the jars.
Meanwhile…
In a small saucepan, fill with water and bring to a simmer. Add the lid disks, cover the saucepan, and take it off the heat.
") Rinse and drain the cucumbers a couple of times and set aside.
Rinse and drain the cucumbers a couple of times and set aside.
") Place brine ingredients in a large saucepan. Bring to a boil over medium-high heat, stirring often until salt is dissolved. Boil for 1 minute. Reduce heat to low and keep liquid hot. Keep covered to prevent evaporation when you’re not using the liquid.
Place brine ingredients in a large saucepan. Bring to a boil over medium-high heat, stirring often until salt is dissolved. Boil for 1 minute. Reduce heat to low and keep liquid hot. Keep covered to prevent evaporation when you’re not using the liquid.
") After the jars have been in the canning pot for over 30 minutes, use the jar lifter (tongs) to lift a jar out of the simmering water. Pour the hot water back into the pot and place the jar on a towel on the counter.
Begin filling the jar with ingredients based on what types of pickles you’ve chosen from the list above.
After the jars have been in the canning pot for over 30 minutes, use the jar lifter (tongs) to lift a jar out of the simmering water. Pour the hot water back into the pot and place the jar on a towel on the counter.
Begin filling the jar with ingredients based on what types of pickles you’ve chosen from the list above.
") PACK the cucumbers in there, leaving about 1″ of head space. Top with “topping” ingredients as outlined above.
PACK the cucumbers in there, leaving about 1″ of head space. Top with “topping” ingredients as outlined above.
")
") Place the canning funnel over the jar and using a ladle, pour hot brine into the jar, leaving 1/2″ head space. Remove air bubbles and adjust head space as necessary by adding hot brine. Wipe the rim with a clean cloth or paper towel.
Place the canning funnel over the jar and using a ladle, pour hot brine into the jar, leaving 1/2″ head space. Remove air bubbles and adjust head space as necessary by adding hot brine. Wipe the rim with a clean cloth or paper towel.
") Using the lid lifter (magnet poker) to remove a lid disk from the saucepan of hot water, dry with clean towel and place it on the jar. Screw on a band until it’s hand-tight. Not too tight, juuuust right.
Using the lid lifter (magnet poker) to remove a lid disk from the saucepan of hot water, dry with clean towel and place it on the jar. Screw on a band until it’s hand-tight. Not too tight, juuuust right.
") Repeat with the remaining jars and ingredients.
Meanwhile, get the canning water back up to a boil.
Repeat with the remaining jars and ingredients.
Meanwhile, get the canning water back up to a boil.
") Place the jars in the canning rack before submerging into the canner.
Place the jars in the canning rack before submerging into the canner.
") Ensure that all jars are covered by at least 1″ of water. Cover, and return to a boil if the water isn’t there already.
Process for 10 minutes (add 1 minute for every 1000 ft. over sea level = 13.5 minutes for Calgary) Start timing after the water has reached boiling.
Turn off heat and remove the lid from the canning pot. Let the jars stand in the hot water for 5 minutes.
Use the jar lifted (tongs) to transfer the jars to a clean towel on the counter. Be sure not to shake the jar, tip it over, tighten the bands, or do anything to disrupt them.
Let them stand for 24 hours. Any jars that do not seal should be refrigerated. (You’ll know they’re sealed when you press on the middle of the lid and nothing pops back up at you. The lid tops should be flat and tight to the touch)
Once the jars are cooled, label them with the name of the recipe, the date made, and the date they’ll be ready [pickles should be given at least 2 weeks to develop!].
Ensure that all jars are covered by at least 1″ of water. Cover, and return to a boil if the water isn’t there already.
Process for 10 minutes (add 1 minute for every 1000 ft. over sea level = 13.5 minutes for Calgary) Start timing after the water has reached boiling.
Turn off heat and remove the lid from the canning pot. Let the jars stand in the hot water for 5 minutes.
Use the jar lifted (tongs) to transfer the jars to a clean towel on the counter. Be sure not to shake the jar, tip it over, tighten the bands, or do anything to disrupt them.
Let them stand for 24 hours. Any jars that do not seal should be refrigerated. (You’ll know they’re sealed when you press on the middle of the lid and nothing pops back up at you. The lid tops should be flat and tight to the touch)
Once the jars are cooled, label them with the name of the recipe, the date made, and the date they’ll be ready [pickles should be given at least 2 weeks to develop!].
")

You May Also Like...


Hi! I'm Leanne (RHN FBCS)
a Functional Medicine Practitioner, host of the Healthful Pursuit Podcast, and best-selling author of The Keto Diet & Keto for Women. I want to live in a world where every woman has access to knowledge to better her health.